



Mar 30, 2026
[New Standards] Motorcycle Engine Displacement Categories: Maintenance Costs, Traffic Rules, and Licenses for Each Displacement
Brake Lever Replacement for Beginners! How to Replace a Broken Lever or Customize
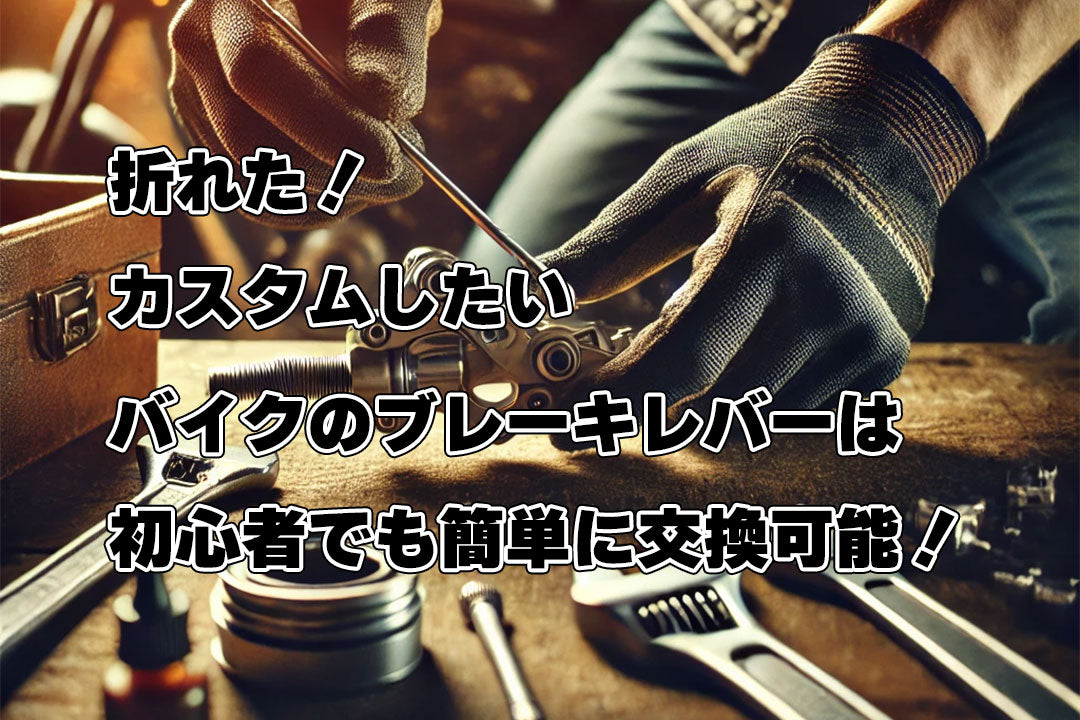
How to Repair or Replace Your Motorcycle's Levers Yourself

Source: https://pixabay.com/ja/photos/BC-6288958/
Brake levers are prone to bending or breaking when a motorcycle falls. If you're replacing them yourself, you can follow these steps:
- Gather the necessary tools
- Remove the brake lever
- Clean and apply grease
- Install in reverse order of removal
- Check operation after installation
Let's look at each step in more detail.
Step 1: Gather the necessary tools
First, you need to gather the tools, chemicals, and replacement brake lever required for the brake replacement.
Tools needed for brake lever replacement include a wrench to remove the brake lever's retaining nut, a flathead screwdriver to fit the pivot bolt, as well as parts cleaner and grease.
If you ride for long periods, such as touring, choosing a replacement brake lever that is comfortable to grip and fits your hand can reduce fatigue during long rides.

Source: https://bikeman.jp/products/kre-4972444030201
Kure Kogyo's "High Penetration Parts Cleaner," from the company that sells CRC5-56, which many people use as a lubricant, is a fast-drying and highly penetrating parts cleaner.
Having a fast-drying parts cleaner means you don't have to interrupt your work while waiting for the cleaner to dry, allowing for smooth brake replacement.
- Volume: 420ml
- Sales Price (incl. tax): 671 yen
Step 2: Remove the brake lever
The brake lever is secured by a retaining nut and a pivot bolt. Removing these will release the brake lever.
First, place a wrench on the retaining nut that secures the brake lever and turn it counter-clockwise. The nut will loosen, so remove the brake lever's retaining nut.
Once the retaining nut is off, turn the head of the pivot bolt counter-clockwise with a flathead screwdriver to loosen it. Remove the pivot bolt, and the brake lever can then be removed.
Step 3: Clean and apply grease
Once the brake lever is removed, clean the area around where it was mounted using parts cleaner.
Spraying parts cleaner directly onto the brake lever area can cause it to splash onto the brakes and front forks, so spray it onto a cloth and use that to clean the area.
After cleaning around the brake lever, check for any damage to the components. If there are no issues, apply grease to the movable parts of the brake lever.

Source: https://bikeman.jp/products/kre-4972444010678
Kure Kogyo's "Silicone Grease Mate Paste" can be used as a lubricant for brake moving parts, areas around the brake, and various cables and wires.
It's a convenient tube type, allowing you to use only the required amount, and its paste consistency prevents it from dripping on vertical surfaces.
- Volume: 50ml
- Sales Price (incl. tax): 987 yen
Step 4: Install in reverse order of removal
After cleaning around the brake lever and greasing the movable parts, assemble the brake lever in the reverse order of how you removed it.
Attach the wire to the brake lever (if it's a wired type), secure it with the pivot bolt, and then tighten the retaining nut.
If you try to tighten only the retaining nut, the pivot bolt will also turn. So, hold the head of the pivot bolt with a flathead screwdriver while tightening the retaining nut with a wrench.
Step 5: Check operation after installation
After replacing the brake lever, squeeze the brake a few times to ensure it operates smoothly without any sticking, and confirm it's working properly.
If there is any excess grease protruding from the movable parts, wipe it off cleanly with a cloth.
If the brake lever's operation isn't smooth, it might be due to insufficient grease. In that case, remove it again and reapply grease.
Timing and Reasons for Replacing Your Motorcycle's Brake Lever

Source: https://pixabay.com/ja/photos/88-1953342/
The most common time to replace a brake lever is when it breaks or bends, but it's also time to replace it when there are operational issues, such as the lever becoming stiff.
Let's look at when to replace a brake lever.
<h3>Brake lever broken</h3>
It's common for brake levers to break when a motorcycle falls over, whether from an accident or just tipping over while stationary.
A broken lever not only makes braking difficult but also poses a risk of injury from its sharp tip, so it should be replaced as soon as possible.
Brake levers utilize the principle of leverage to achieve a large effect with a small force, so repairing a broken one will likely result in it breaking again.
If the brake cannot be used normally, safety is compromised, so if a brake lever breaks, replace it as soon as possible.
Brake lever bent
Even if the brake lever doesn't break completely but only bends due to impact from a fall or similar incident, replacement is recommended.
Depending on how much the brake lever is bent, the operable part may become shorter, reducing the number of fingers that can be used to grip the brake, which can impair normal braking operation.
Also, even if a bent brake lever is straightened, its rigidity may be compromised, or it may break again. Therefore, for safety reasons, replace a bent lever as soon as possible.
Other times to replace: rust or sluggish movement
If you feel a catch when you squeeze the brake lever or if its operation becomes sluggish, you should consider replacing the brake lever.
Sometimes, this can be improved by removing the brake lever, cleaning the surrounding area with parts cleaner, and then applying grease.
After greasing and reassembling the brake lever, leaving excess grease can increase the risk of dust and sand adhering to it, so be sure to wipe off any unnecessary grease.
Want to customize to your liking
When you want to customize your brake lever to your liking, it's also time to replace it.
Since factory-standard brake levers are designed for average body types, they may not always feel right for you. Replacing them with custom parts can sometimes improve operability.
Additionally, some brake levers offer aesthetic enhancements, contributing to both improved handling and appearance.
How to Choose a Replacement Brake Lever

Source: https://pixabay.com/ja/photos/AF-2430193/
There are many types of brake levers available, including genuine parts and customizable options, so you might be wondering which one to choose when replacing your brake lever.
In this section, we will explain how to choose a brake lever, so please refer to it if you are considering a replacement.
For genuine parts, confirm the compatible model number
When replacing with genuine or equivalent brake levers, confirm your bike's model number that matches the brake lever before purchasing.
If purchased at a motorcycle shop, brake levers typically cost around 1,500 to 3,000 yen, and the labor cost for installation is about 2,000 yen.
If you replace it yourself, only the cost of the brake lever is required, so you can replace it at a lower cost.

Source: https://bikeman.jp/products/kt-70-525-61230
In addition to genuine parts, some after-market manufacturers also offer equivalent products for certain models.
KITACO's "Handle Lever Right Side Brake Lever Black HR-23" is a genuine equivalent brake lever for Honda CBR250RR (MC51, etc.).
As it's an equivalent to genuine parts, it can be installed without any modifications when replacing damaged, bent, or broken levers after a fall.
- Compatible genuine part number: 53175-K64-N01
- Sales Price (incl. tax): 1,421 yen
Choose by material
Brake levers are generally made of aluminum, like genuine parts, or anodized aluminum.
Anodized aluminum is a material that undergoes an electrolytic process to form an oxide film on the aluminum surface, giving it greater corrosion and abrasion resistance than plain aluminum.
Anodized aluminum and stainless steel options are also available, offering a beautiful finish and enhancing the bike's high-class feel for a strong dress-up effect.

Source: https://bikeman.jp/products/wwd-6815-0205
Torc1 Racing's "Vengeance Brake Lever" is a colorful and aesthetically pleasing stainless steel brake lever.
This high-quality brake lever allows for a bit of customization by choosing a color that matches your bike's style and your personal preference.
A black spare brake lever is included in case of damage from a fall, providing peace of mind.
- Compatible models: KTM 250-500 models
- Sales Price (incl. tax): 9,900 yen
Choose one with adjustment features
Some brake levers have adjustable reach, allowing you to fine-tune them to your hand size and grip comfort.
Additionally, some models have a feature that allows them to fold away from the base in the event of a fall, preventing damage to the brake lever itself.
Choosing a brake lever with adjustable features that fit your hand will make braking easier and enhance safety, so it's highly recommended.
Choose by length and design according to preference
Brake levers come in various lengths, including standard types and shorter short types.
Additionally, there are many different designs, such as brake levers with a wider grip than genuine parts, making them easier to hold.
Choosing a brake lever that suits your preferred length and width, and matches your bike's design, will improve operability and change its overall appearance.
FAQ on Motorcycle Brake Lever Replacement

Source: https://pixabay.com/ja/photos/8A-2843341/
Here, we have compiled "frequently asked questions and concerns" and their "answers" regarding motorcycle brake levers.
We've explained the costs and time involved in replacement, so if you're considering replacing your brake lever, please refer to this as well.
What is the cost of replacing a motorcycle brake lever?
If you have a motorcycle brake lever replaced by a professional at a motorcycle shop, the estimated replacement cost is around 2,000 yen.
This includes cleaning after removal and greasing when installing the new brake lever.
If you replace it yourself, you'll need tools, plus parts cleaner for cleaning, grease, and rags. Considering the cost of gathering all these, there won't be much difference compared to having it replaced by a professional.
How long does it take to replace a motorcycle brake lever?
The time it takes to replace a motorcycle brake lever varies by person. For those who are used to performing parts replacements and working with tools themselves, it might take about 15 to 20 minutes.
If you're not very experienced with such tasks, it's good to allow about 30 minutes to an hour, but replacing a brake lever is not considered a particularly difficult task among motorcycle parts replacements.
However, since brakes affect riding safety, if you're unsure about the replacement, it's best to ask a professional at a motorcycle shop.
Are there any precautions or tips to avoid mistakes during replacement?
When replacing the brake lever, important precautions are to thoroughly clean the surrounding area after removal and to not forget to apply grease.
If you forget to grease, you might feel a catching sensation when applying the brakes or hear strange squeaking noises.
Also, when installing the replacement brake lever in the reverse order of removal, it's important to be careful not to overtighten the bolts.
Summary

Source: https://pixabay.com/ja/photos/AF-5880126/
Since motorcycles are prone to falling, brake levers often get bent or broken.
If the brake lever is damaged, it may not function correctly, so it's recommended to replace it as soon as possible.
If you replace it yourself, be sure to clean it after removal, apply grease, and always check its operation after installation.
Recommended Products
Latest Articles

Popular product


×
![]()