


Mar 30, 2026
[New Standards] Motorcycle Engine Displacement Categories: Maintenance Costs, Traffic Rules, and Licenses for Each Displacement
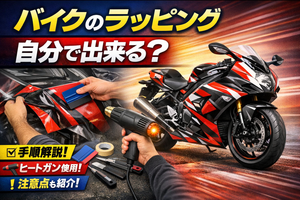
Can you wrap your own motorcycle? How to do it yourself, steps, and precautions

Can you really wrap a motorcycle yourself?

Source: https://pixabay.com/ja/photos/bc-497001/
While it is possible to wrap a motorcycle yourself, the difficulty varies greatly depending on how much of the bike you plan to wrap.
Partial wrapping, such as only the mirrors, fenders, or side covers, is perfectly doable for beginners. However, full wrapping, covering the entire cowl or gas tank, is more difficult and better suited for intermediate to advanced users, with a higher risk of failure.
Difficulty by part
The difficulty of motorcycle wrapping changes depending on the part you are applying it to, as follows:
| Part | Difficulty | Description |
| Mirrors/Fenders | ★☆☆☆☆ | Mostly flat surfaces. Ideal for practice. |
| Side Covers/Top of Tank | ★★☆☆☆ | Slightly curved. OK if applied carefully. |
| Entire Cowl | ★★★★☆ | Many large curves, difficult to stretch. |
| Front of Tank | ★★★★★ | Most challenging. Complex curves + heat gun operation essential. |
Recently, wrapping films with air-release channels (air-free) have become mainstream, making them easier to apply and lowering the difficulty of the process.
If you choose a repositionable wrapping film, you can reapply it even if you don't get it perfectly right the first time, reducing the risk of failure.
On the other hand, parts with many curves, like cowls and tanks, require skill in stretching the wrapping film. The key to successful application is understanding "how to use a heat gun" to heat and stretch the film.
How to wrap a motorcycle yourself: Steps and Procedure

Source: https://pixabay.com/ja/photos/bmw-k1200s-a4-2486777/
If you are wrapping a motorcycle yourself, follow these steps:
| Step | Content | Key Points |
| ① Preparation | Gather necessary tools and set up the environment | Temperature, cleanliness, and tools are key to success |
| ② Cleaning | Remove dirt and grease from the base surface | Essential to prevent peeling and air bubbles |
| ③ Test fit | Place the film to confirm positioning | Visualize the finished product before cutting |
| ④ Application | Soften the film with a heat gun and apply | Apply gradually while pushing out air |
| ⑤ Finishing | Trim edges, remove air bubbles, and press firmly | Prevents peeling, improves appearance |
| ⑥ Curing | Leave for 24+ hours to set | Prevents re-application, stabilizes adhesion |
Thoroughly remove oil from the area to be wrapped, then dry-fit the wrapping film to the desired position to confirm the final image.
Once the dry-fit looks good, apply the wrapping film using a heat gun, trim any excess edges, and allow it to set.
First, you'll need to gather the necessary tools, which are as follows:
① Preparation: Necessary Tools and Environment
| Tool | Purpose |
| Wrapping Film (Air-release type) | Main material. Choose an easy-to-apply material (3M, Avery, etc.) |
| Heat Gun | Softens the film to fit curves |
| Squeegee (rubber spatula) | Pushes out air during application |
| Cutter (small, replacement blades essential) | Trimming edges and fine details |
| Masking Tape | Marking temporary positions and alignment |
| Alcohol Spray & Wipe | Degreasing and cleaning |
| Gloves (suede fabric) | Prevents fingerprints & allows smooth application |
For wrapping film, choosing an air-release type that prevents bubbles and opting for materials from reputable brands like 3M or Avery will make application easier and reduce mistakes.
A heat gun is a tool similar to a hairdryer that softens the wrapping film with heat to make it easier to apply; it's essential for working with curved surfaces.
A "design knife" with a fine tip is better suited for detailed work than a general utility knife, and gloves will prevent fingerprints and grease from getting on the motorcycle.

Source: https://bikeman.jp/products/gc-g03-0012
GUTS CHROME "3M Masking Tape" is a well-balanced masking tape with excellent adhesive strength, making it easy to apply to both straight and curved surfaces.
It leaves minimal adhesive residue on the vehicle when removed and maintains its stickiness after several removals, which is useful for precise positioning.
- Product Name: 3M Masking Tape
- Manufacturer: GUTS CHROME
- Dimensions: (Width) 12mm x (Length) 18m
- Selling Price (incl. tax): 128 yen
② Cleaning and Degreasing
Cleaning and degreasing the surface to be wrapped is a crucial step that determines the finish, as it completely removes dust, oil, and wax from the surface.
Especially if wax has been applied, the oil in the wax will reduce the adhesive strength of the wrapping film, making it impossible to apply neatly.
A neutral detergent + alcohol spray is suitable for degreasing. After washing the bike, perform degreasing, but be sure to thoroughly remove any remaining moisture or oil, as these can cause the wrapping film to "peel, lift, or have uneven adhesion."
③ Test fitting and cutting
Once cleaning and degreasing are complete, temporarily place the wrapping film on the part you want to apply it to and check the required size.
When applying the wrapping film with heat from a heat gun, the film will stretch, so cut it 3-5 cm larger than necessary to allow for extra material.
Fix the edge of the wrapping film with masking tape and confirm the image. After that, peel off about 1cm of the release liner from the edge of the wrapping film and temporarily secure it.
④ Application
Once temporarily secured, proceed to apply the entire wrapping film. It's best not to peel off the entire release liner at once; apply it in halves to prevent misalignment.
Use a squeegee (rubber spatula) to push air from the center outwards, and for curved surfaces, gently heat the film with a heat gun to soften and stretch it, applying it slowly and carefully.
Be careful not to overheat the film with the heat gun, as overstretching can cause deformation or uneven thickness. If wrinkles appear, you can peel back the film, reheat it, and reapply it.
Application method by part
The difficulty of wrapping a motorcycle varies depending on the part you're applying it to, and following the tips below can make application easier.
| Part | Application Tips |
| Mirrors/Fenders | Mostly flat, so squeegee from center outwards. Pull corners with a heat gun afterwards. |
| Side Covers | Soften corners with a heat gun, pull, and fold back underneath. |
| Top of Tank | From center to sides. Stretch along the curves. |
| Entire Cowl | Basically, apply in sections. Don't force one piece to cover everything; work panel by panel. |
Mirrors and fenders have many flat surfaces, making them less difficult to apply. However, for curved parts and corners, using a squeegee while stretching the wrapping film with a heat gun will help you apply it smoothly.
The most challenging parts are the complex shapes of the gas tank and the entire cowl, with the top of the gas tank being particularly intricate.
Starting from the center and moving outwards to the sides, it becomes easier to apply by stretching the film along the curves using a heat gun.
⑤ Finishing: Handling Air Bubbles and Wrinkles, and Sealing Edges
After applying the wrapping film, check for any air bubbles or wrinkles and firmly press down the edges.
Since wrapping film tends to peel from the edges, firmly press down the edges. If air bubbles appear, address them according to their size as follows:
For small air bubbles (3mm diameter or less)
Small air bubbles with a diameter of 3mm or less often disappear over time (around 2-3 days), so it's generally okay to leave them alone. However, if they bother you, treat them as follows:
- Poke a small hole with a safety pin or utility knife.
- Push from the center outwards with a finger or squeegee.
- Lightly warm with a heat gun to allow the film to conform.
When removing air bubbles with a safety pin or utility knife, be careful not to pierce too hard, as it can cause cracks in the wrapping film or scratches on the painted surface. Make the hole as small and inconspicuous as possible.
After making the hole, push the air from the center outwards with your finger or a squeegee, then gently warm the wrapping film with a heat gun to allow it to conform, and you're done.
For large air bubbles (5mm diameter or more)
Large air bubbles with a diameter of 5mm or more are unlikely to naturally release air. The basic approach is to release the air with a cutter or safety pin, or if it won't release, to reapply the film.
If you peel off wrapping film that has already been applied, the adhesive strength may decrease, leading to future peeling or lifting, so it's best to reapply with a new sheet of wrapping film.
If you have a re-adhesive type film (like 3M 1080 series), you can reapply it. Gently warming it with a heat gun can help restore adhesion.
Wrinkle treatment
If wrinkles appear, gently heat the wrinkled area with a heat gun (50-70°C). Once soft, slightly lift the edge and reposition it.
Be careful not to apply excessive force to smooth out wrinkles, as this can deform the wrapping film or cause it to peel more easily due to its tendency to shrink back after being stretched.
Gently warm the wrinkled area, slowly stretch it, and reapply, then use a squeegee to gently press it from the center outwards.
If wrinkles still remain, it's safer to reapply the film, but note that with some wrapping films, reapplication can reduce the adhesive strength.
⑥ Curing and Drying Period
Once the wrapping film is applied, let it sit for at least 24 hours to allow it to set.
Immediately after application, the adhesive is not yet stable, so avoid washing the bike or riding in the rain, and try not to touch the wrapped surface as much as possible (because the adhesive is not stable).
Re-pressing it lightly after 2-3 days will make it even more resistant to peeling and last longer, so be sure to do that as well.
Precautions and Risks when Wrapping Your Own Motorcycle

Source: https://pixabay.com/ja/photos/b0-6850087/
While you can wrap a motorcycle yourself, there are precautions and risks to be aware of. Knowing them in advance can help you avoid potential problems.
Furthermore, it will enable you to achieve a cleaner finish, so if you're considering wrapping your own motorcycle, please refer to this information.
Technical Risks (Finish/Failure)
When wrapping a motorcycle yourself, there are the following technical risks:
- Risk of air bubbles, wrinkles, and lifting
- Risk of overstretching or tearing the film
- Risk of edge peeling and lifting
- Risk of cutting errors (damaging the vehicle or paint)
- Risk of color unevenness or misalignment between sections
There is a risk of air bubbles, wrinkles, or lifting in the wrapping film, as well as the risk of overstretching or tearing the film.
There's a risk of the edges peeling, causing the wrapping film to detach easily or lift. There's also the risk of damaging the vehicle body or paint during cutting.
Additionally, there's a risk of "color unevenness" where different parts of the wrapping film have different colors, or designs becoming misaligned.
Precautions regarding preparation and environment
By paying attention to preparation and environmental factors like temperature before applying the wrapping film, you can reduce risks.
Inexpensive wrapping films may have inferior quality, such as poor adhesive strength, color, or stretchiness, which can negatively impact the work and finish. Therefore, it's recommended to choose reputable brands like 3M.
If the surface preparation, such as cleaning and degreasing before application, is insufficient, even a high-quality wrapping film will be prone to peeling. Therefore, thorough surface preparation is essential.
Also, pay attention to the working environment, including temperature and room temperature, as low temperatures can harden the wrapping film and make it difficult to work with. (Ideal working temperature: 18-25 degrees Celsius, ideal humidity: 40-65%)
Legal and Safety Risks
When applying wrapping film yourself, in addition to technical risks, there are also legal and safety risks, and full body wraps may require application.
We will explain the legal and safety risks, so please use this as a reference if you are considering wrapping yourself.
Registration information and handling of reflective materials
Even if you apply wrapping film to the entire motorcycle and the body color changes from when the motorcycle was registered, there is no need to apply for a color change, and it will still pass vehicle inspection.
However, wrapping safety parts such as headlights, turn signals, and license plates is prohibited, and doing so is a violation of the law subject to punishment.
Covering reflectors or lights will violate safety standards and cause the vehicle to fail inspection. If deemed a malicious modification, it could result in imprisonment for up to 6 months or a fine of up to 300,000 yen.
Safety while driving
If the wrapping film's adhesion is poor, it can peel off in the wind while driving, causing flapping and posing a danger.
Especially before high-speed driving, it is essential to check that the edges of the wrapping film are not lifting or peeling.
Also, make sure to fold over the edges of the film and press them firmly to prevent them from peeling off.
Recommended Products
Latest Articles

Popular product


×
![]()