


Mar 30, 2026
[New Standards] Motorcycle Engine Displacement Categories: Maintenance Costs, Traffic Rules, and Licenses for Each Displacement
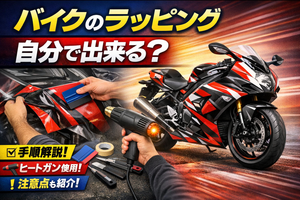
Spray paint your cowl to make your beloved bike even cooler!

Riders, have you ever thought about changing the color of your beloved bike to make it even more to your liking? Or perhaps you've noticed some unsightly scratches?
Painting a full fairing, in particular, can be quite expensive if you entrust it to a professional.
Fairing painting can significantly change the appearance of your motorcycle, making it irresistible for custom enthusiasts.
Moreover, repainting can also make your motorcycle more resistant to dirt. This article provides a detailed explanation of how even an amateur can successfully spray paint a fairing, including tips, tricks, and what you need to prepare. Once you can paint your own bike, your enjoyment and attachment to it will deepen and broaden! The joy of carefully and lovingly finishing a paint job and the thrill of riding around on your newly customized bike are truly exceptional.
So, go ahead and try to finish your motorcycle in a unique color with your own hands.
Table of Contents
- What to Prepare for Fairing Painting
- Painting Procedure
- Points to Note and Tips
- Referencing Other People's Paint Jobs
- Summary
1. What to Prepare for Fairing Painting
When starting to paint, the first problem is what tools you need.
It's common to buy painting items at specialty stores.
Here's a list of tools you'll want to have for fairing painting:
・Tools
・Gloves
・Waterproof sandpaper (320-2000 grit)
・Plastic primer/surfacer
・Putty
・Primer spray
・Topcoat spray
・Urethane clear coat spray
・Silicone remover (or detergent and sponge)
・Compound

There are various types of paint, such as acrylic lacquer, lacquer, enamel, and urethane, but in terms of quality, urethane is overwhelmingly superior. However, the downside is that it's exceptionally expensive. While the finish is good and it lasts a long time, so it's certainly not a loss in the long run, it's recommended to combine it with cheaper options, such as using an inexpensive primer.
However, remember that sprays have varying compatibility, so choose accordingly.
2. Painting Procedure
Now that you have your tools, let's get started!
① First things first! Surface preparation
Anyone with painting experience knows the importance of the first step: surface preparation.
It's no exaggeration to say that the quality of the finished product depends on how much effort you put into this stage, working carefully and meticulously.
● First, use a screwdriver or similar tool to remove the fairing you're going to paint.
● To achieve a cleaner finish, remove the fairing's original paint (stickers, coatings, etc.). Sand thoroughly with rough waterproof sandpaper (around 320 grit) until the gloss is gone.
● If there are any scratches, sand those areas carefully again, degrease with silicone remover, and then fill the scratches with putty. Once the putty dries, sand again, aiming for as flat a surface as possible. It might seem tedious, but make sure to degrease thoroughly afterward.
② Priming

After degreasing the entire surface with silicone remover and completely removing dust and fine dirt, it's time for priming.
Apply multiple coats of plastic primer/surfacer, which acts as an instant adhesive for the paint, over the entire surface. Once dry, sand with 600-grit waterproof sandpaper until primer dust appears.
③ Finally, the topcoat
Now you can finally apply the topcoat.
Using your preferred spray, paint quickly, thinly, and evenly.
Spray from 20-30 cm away, applying thin, overlapping coats to avoid drips. When applying multiple coats, especially in winter or during the rainy season, make sure to allow sufficient drying time.
If the spray can's remaining volume is low, it won't spray evenly or beautifully, so if you feel it's difficult to apply, it's recommended to immediately switch to a new spray can.
Then, degrease and dry again.
④ Clear coat application
Finally, apply several coats of urethane clear coat spray for a glossy finish and paint protection.
Once the clear coat dries, use a compound (one that isn't too abrasive) for the final polishing.
This completes the process.
3. Points to Note and Tips
I've summarized the steps for fairing painting, and now I'll clearly outline the important points and tips.
● Prepare your painting environment
● Use automotive products for spray paint, not architectural ones.
● If there are areas you don't want painted, mask them off with masking tape.
● Oil stains can cause the paint to repel, leading to an unsatisfactory finish, so diligently degrease with a dedicated cleaner.
● When sanding the primer, avoid over-sanding to ensure better adhesion of the topcoat.
● Dust and foreign matter can easily cause lumps, so work in an environment where dust is less likely to rise.
● Consider the paint selection and mixture based on what you're painting (e.g., paint compatibility). For example, if using urethane, avoid lacquer-based paints.
● Do not use chemical paint removers when stripping paint from the fairing.
● The key is to meticulously dry and degrease without cutting corners! (As a guideline for dryness, when you sand, fine powder should come off without stickiness.)
● Be careful not to spray too much paint, as it can run and drip.
● Spray at a consistent speed and direction.
● To prevent dirt and allow for spraying as horizontally as possible, place the item to be painted on an elevated surface away from the ground.
Knowing these points in advance should help you succeed. Many people fail due to similar issues, so please be extra careful!
And most importantly, don't rush. Enjoy the process of working calmly and steadily.
It's a painstaking task, but the joy of completion is truly special.
4. Referencing Other People's Paint Jobs
Among those who write blogs about motorcycles, some also detail fairing painting. Reading articles about people customizing well-known naked bikes like Kawasaki's Zephyr and Balius, Honda's CB400SF, or Yamaha's XJR400 in their own unique ways, brings back that fresh, exciting feeling of youth. This is because they realistically describe how these masculine bikes become even more attractive!
They also share tips and recommended tools they've discovered after several attempts, making them interesting to read even if you're not painting yourself. Also, since people work in various environments, you can get a better idea of how to approach your own painting by looking at blogs from people who work in conditions similar to yours. If you have specific questions, it's also a good idea to leave a comment. You might even make new connections.
There are actually many blogs dedicated to motorcycles, so please check out various people's bike customizations and imagine how you would like to customize your own.
When you envision your beloved bike transformed into something cool, the process of choosing tools and even the meticulous work become incredibly enjoyable. By drawing inspiration from blog photos, you can also broaden the range of colors you can imagine.
5. Summary
This time, I talked about how to paint fairings and points to note.
If you paint it yourself, you'll gain a unique experience and an original motorcycle. The real thrill of DIY spray painting, I believe, is that it allows you to achieve that originality.
By all means, step into the wonderful hobby world of fairing painting.
If you paint it yourself, you'll gain a unique experience and an original motorcycle. The real thrill of DIY spray painting, I believe, is that it allows you to achieve that originality.
By all means, step into the wonderful hobby world of fairing painting.
Recommended Products
Latest Articles

Popular product


×
![]()